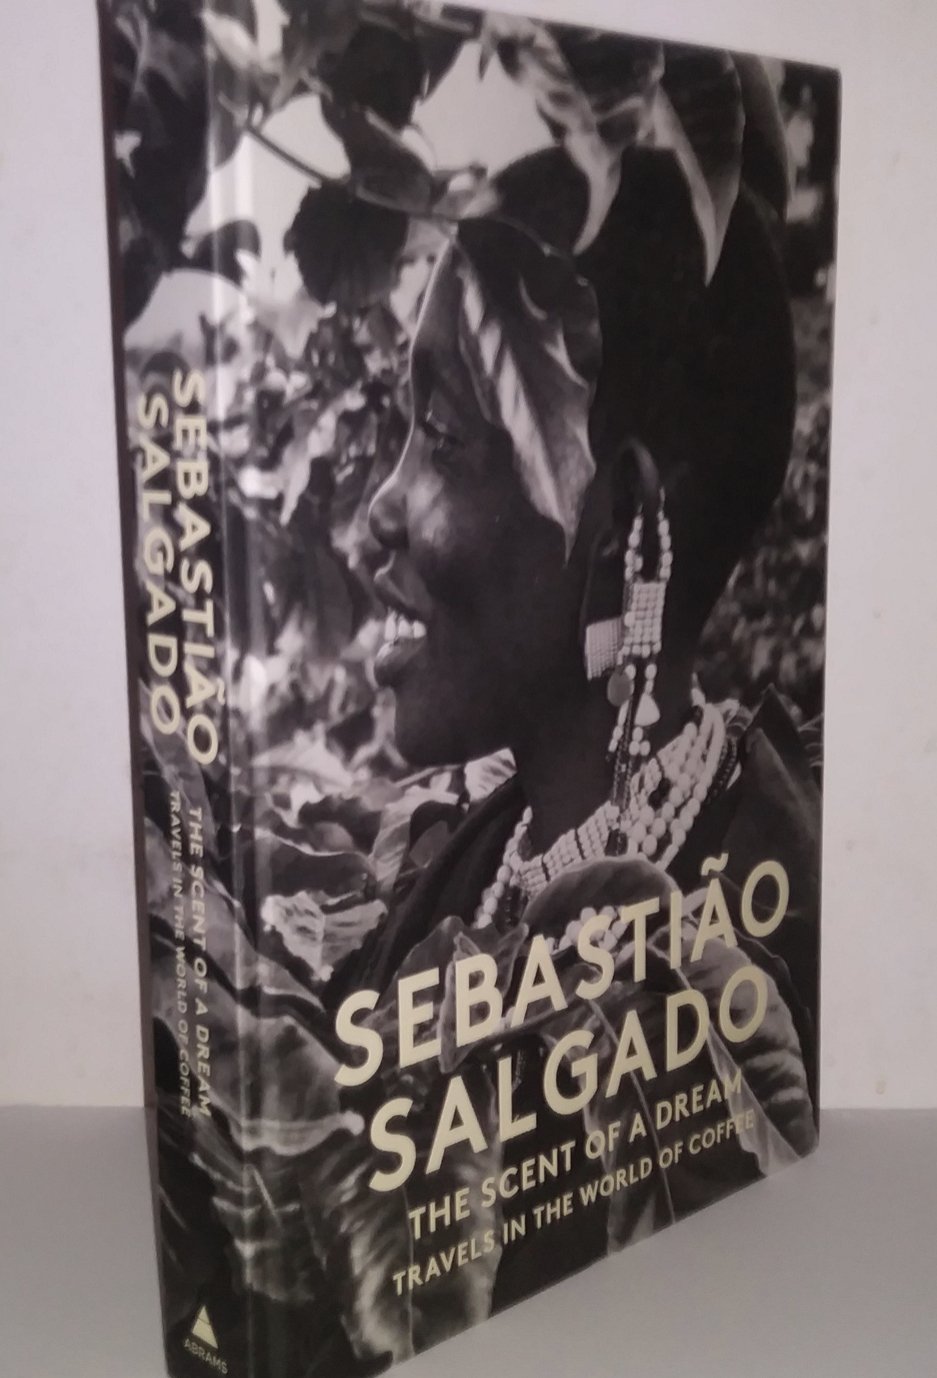
Sebastiao Salgado - The scent of a dream

Sebastiao Salgado - The scent of a dream - Travels in the work of coffee - a review

The Scent of a Dream is a 2015 photo book published by Abrams books featuring the phenomenal images of black and white artist Sebastiao Salgado. The book depicts images from Sebastian’s travels across the world. The overarching theme is coffee. The viewer is presented with stunning scenes of workers associated with the worldwide coffee trade. 

As a black and white study, Salgado proves why he is a master of black and white photography. His use of available light is impressive. Salgado constantly find the exact place to place himself such that the viewer always sees the most stark contrast. As a viewer I find myself lost in scenes of coffee around the world. The book in sequenced to ensure the viewer sees a narrative for the coffee, starting at the very beginning, in the vast fields of raw coffee bean plants, all the way to mass processing of the coffee prior to it being shipped to you. The viewer is gifted with understanding the process of making, growing, harvesting, and processing coffee from the beginning to the end

Interestingly, the concept, design, and editing was done by the artist’s wife, Lelia Wanick Salgado. I love that the husband and wife combo present the book together. I am truly happy for Sebastiao, having found a partner who is not only interested in their partner’s, but also vested in successful roll out of the product. It is truly a testament to a loving and devoted family and artistic team. 

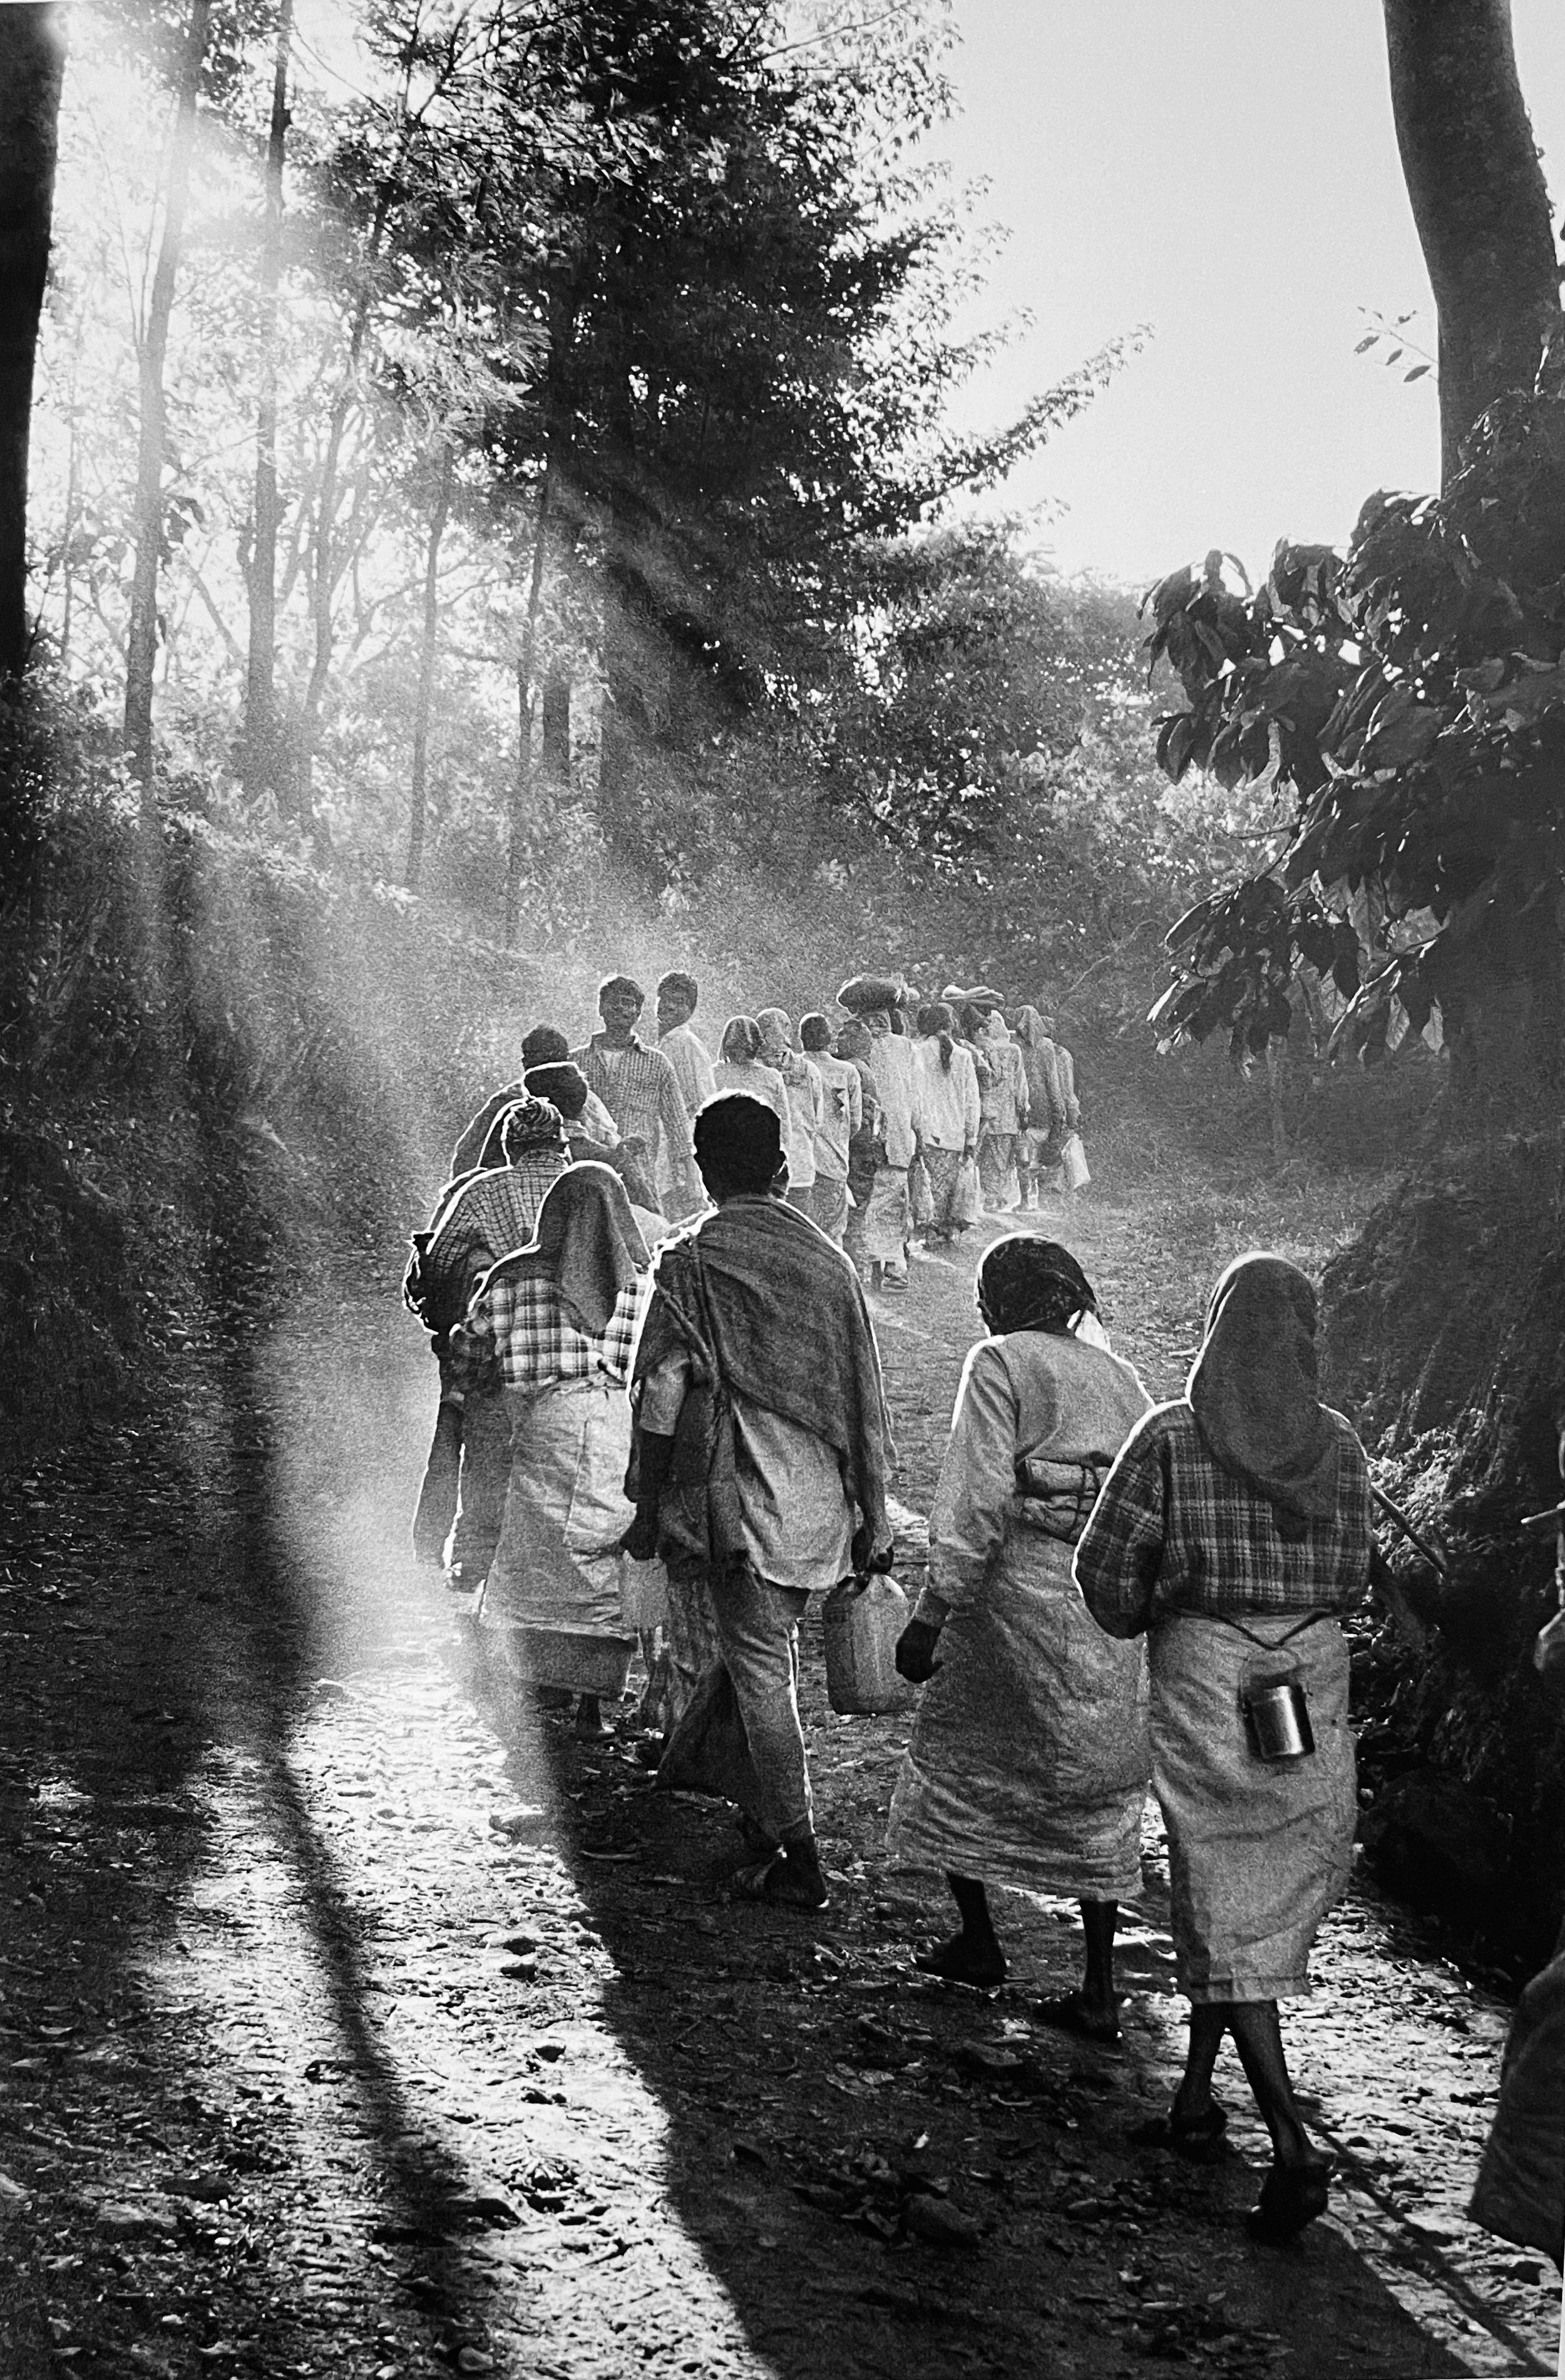
Here Salgado presents in a line moving toward the coffee fields. As a black and white photographer here is my technical understanding of this scene. I observe something I can only describe as impressive work. The entire greyscale is represented, which I enjoy. Salgado positioned himself in such a way to take in the line of people. The sunlight through the trees creates a artistic white line around some of the subjects toward the middle of the image. That light painting adds a layer of beauty as well. 

As a human observer of art and armchair cultural anthropologist, this image immediately formulates questions about what I see. Where are these peoples coming from? Is this a daily ritual for those who work in the coffee fields? Finally, a question I will always have, how did Salgado find himself there? I find this work to be moving. I immediately feel for these people, and any people who are doing work like this around the world. To me, this is impressive work. 

What do you think? I would love to know in the comments.

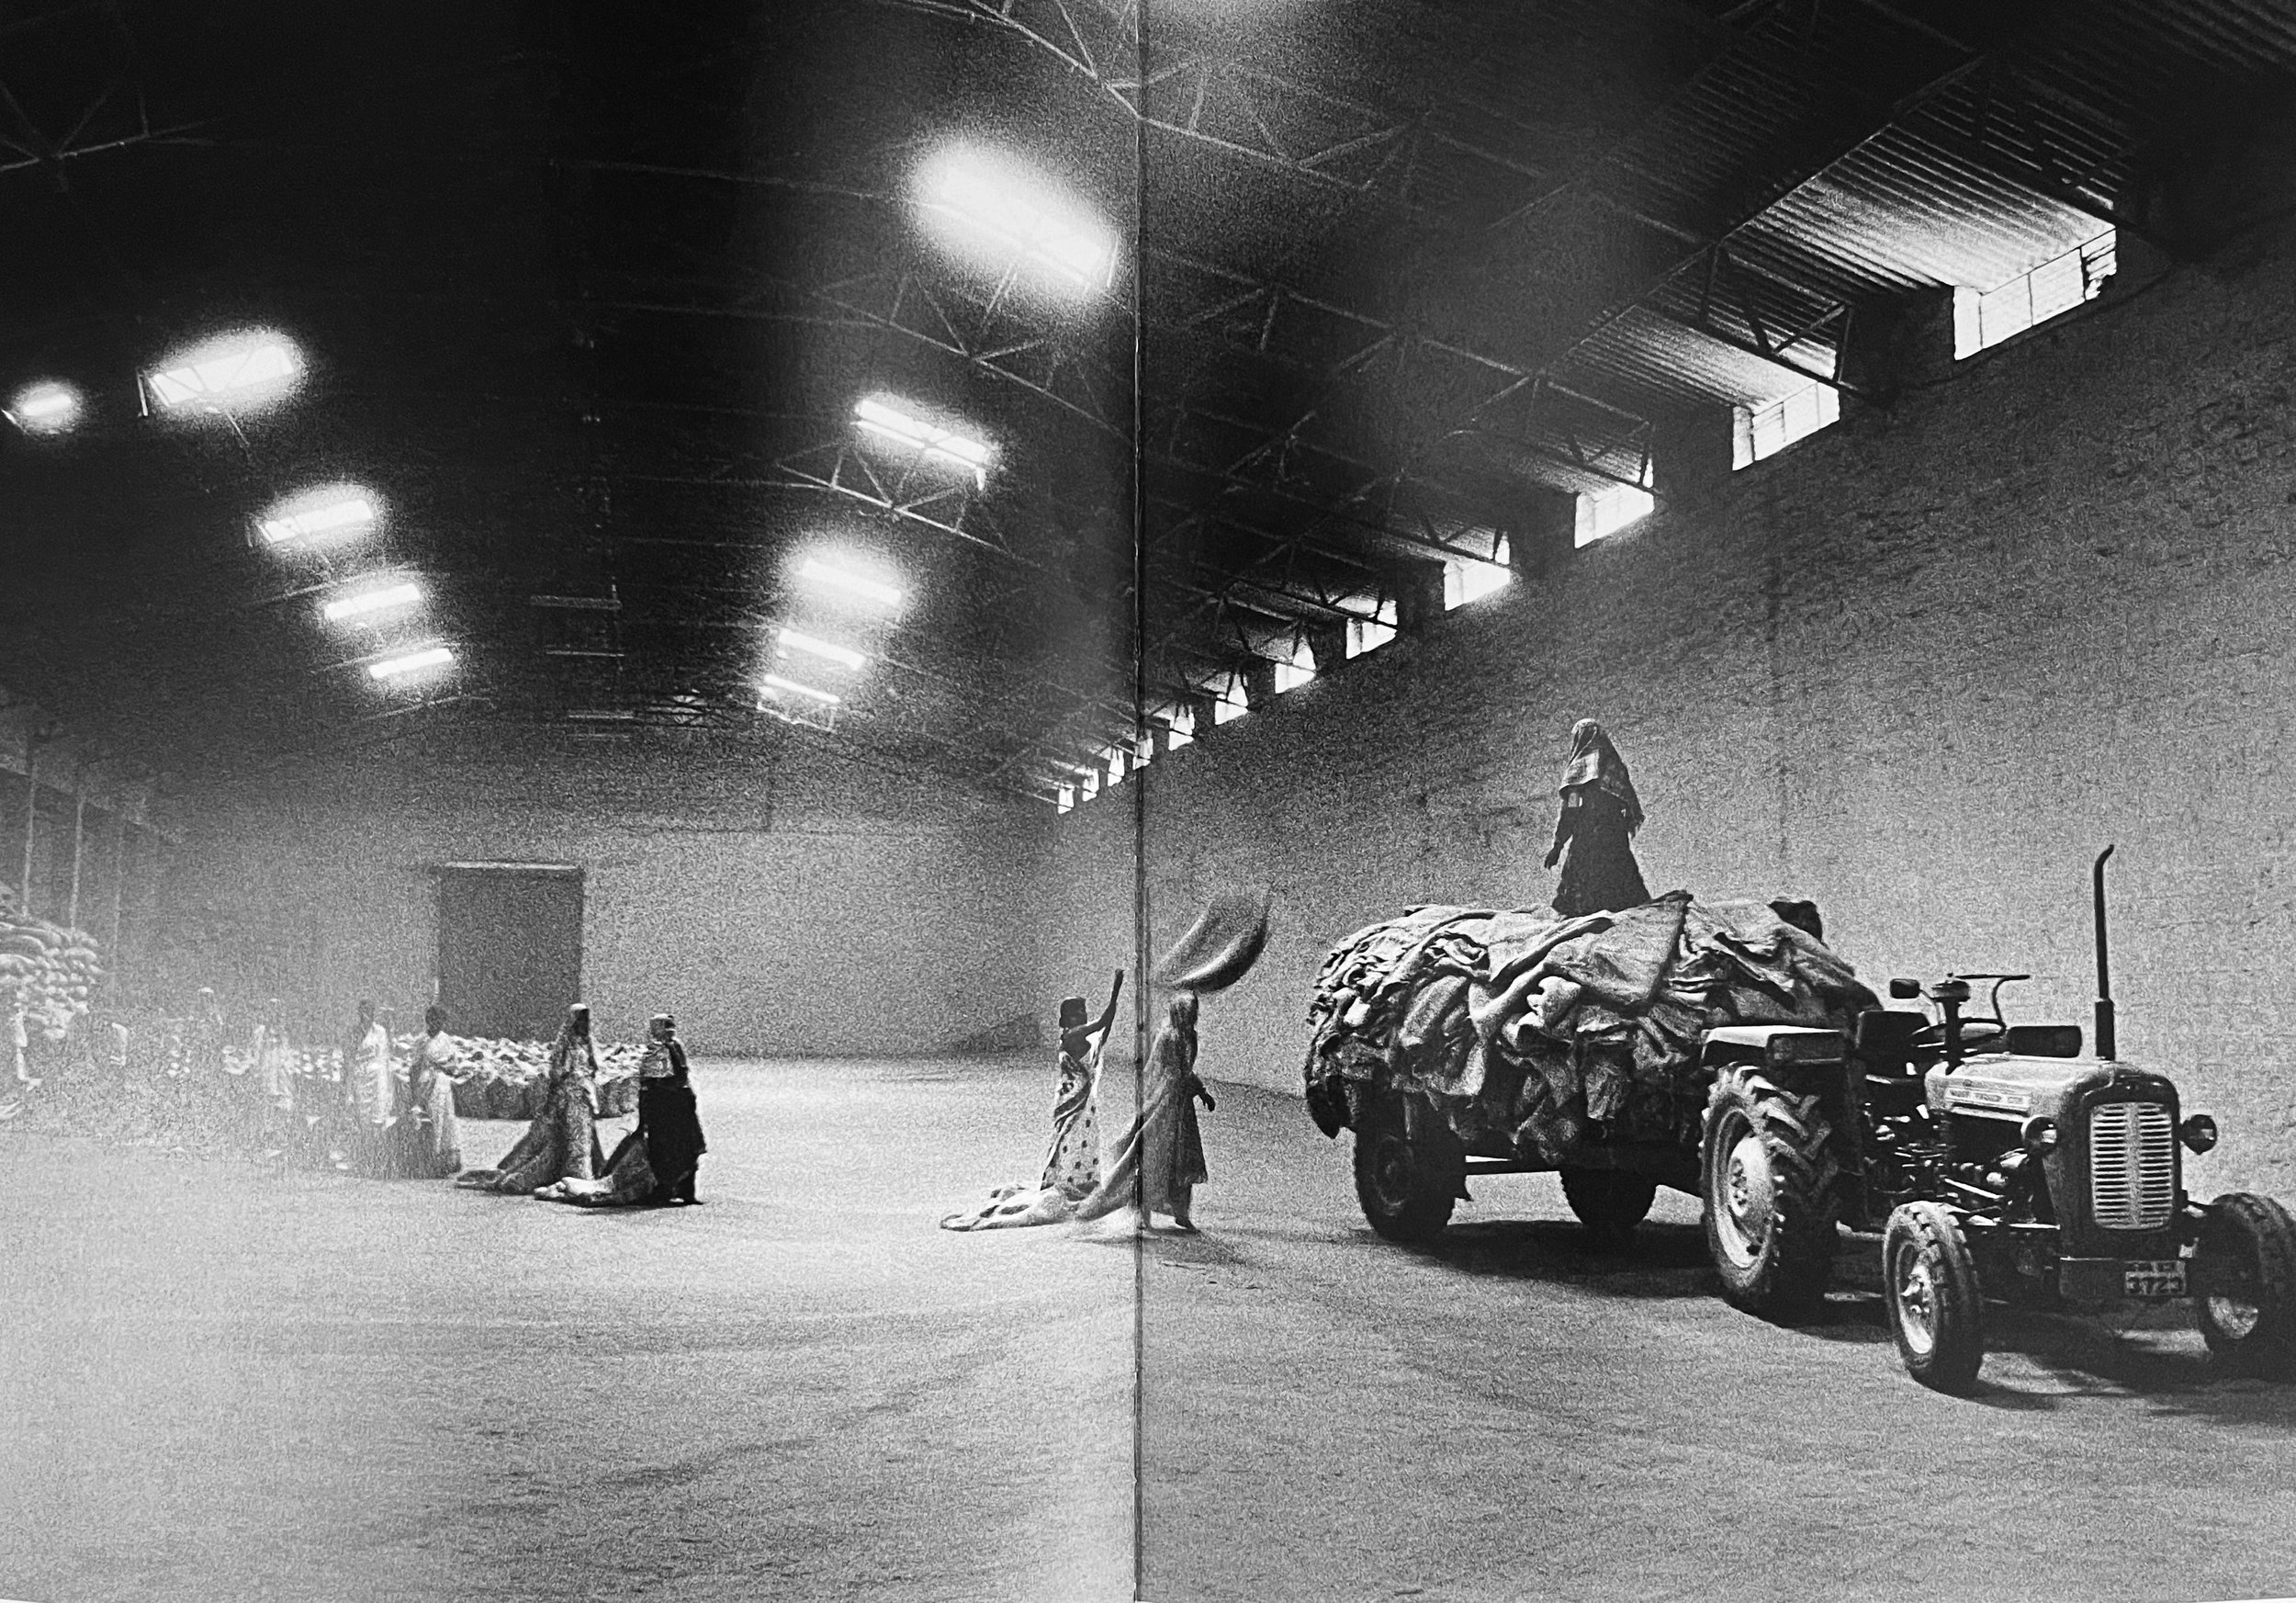
Here Salgado Showing the movement of some of the coffee, already bagged, onto a truck. Again the light that Salgaldo found was extraordinary. The light rays have a great haze to them. The lights themselves lead to some of the subjects, s suspended in motion with the coffee bags. The contrast of the bags in the foreground is also done well. The coffee bags themselves in the foreground add to the sense of depth and 3 dimensionality of the piece. Finally, the grain and haze / diffusion around the lights could only be accomplished with a stunning film emulsion. 

As I look at this image, I wonder how long these individuals have to fill these trucks daily. What is the quota per day. I have a sense of awe and wonder as I peer into the lives of these workers

In the next image, again Salgado plays with his placement of light. Notice the intentionality in this work. He ensured he stood behind the tree to give the view this visual effect. The same sense of depth is created with his imaginative placement of the characters in the scene. Not only is the scene already contrasted well; the light behind the tree adds to this overall. 

There is a coy smile on the worker directly in front of the tree, which add to this sense of emotion of the piece. Even through this grueling work, Salgado was able to find some happiness in his subject. Salgado always know hows to find the humanity in a scene, even in the most remote locations in the world, such as this. 

Finally, the image is edited in such a way that the viewers eye is drawn directly to what Salgado wants you to see. Personally, I am immediately drawn to the stark light, then my gaze moves down to the beautiful woman with the smile. 

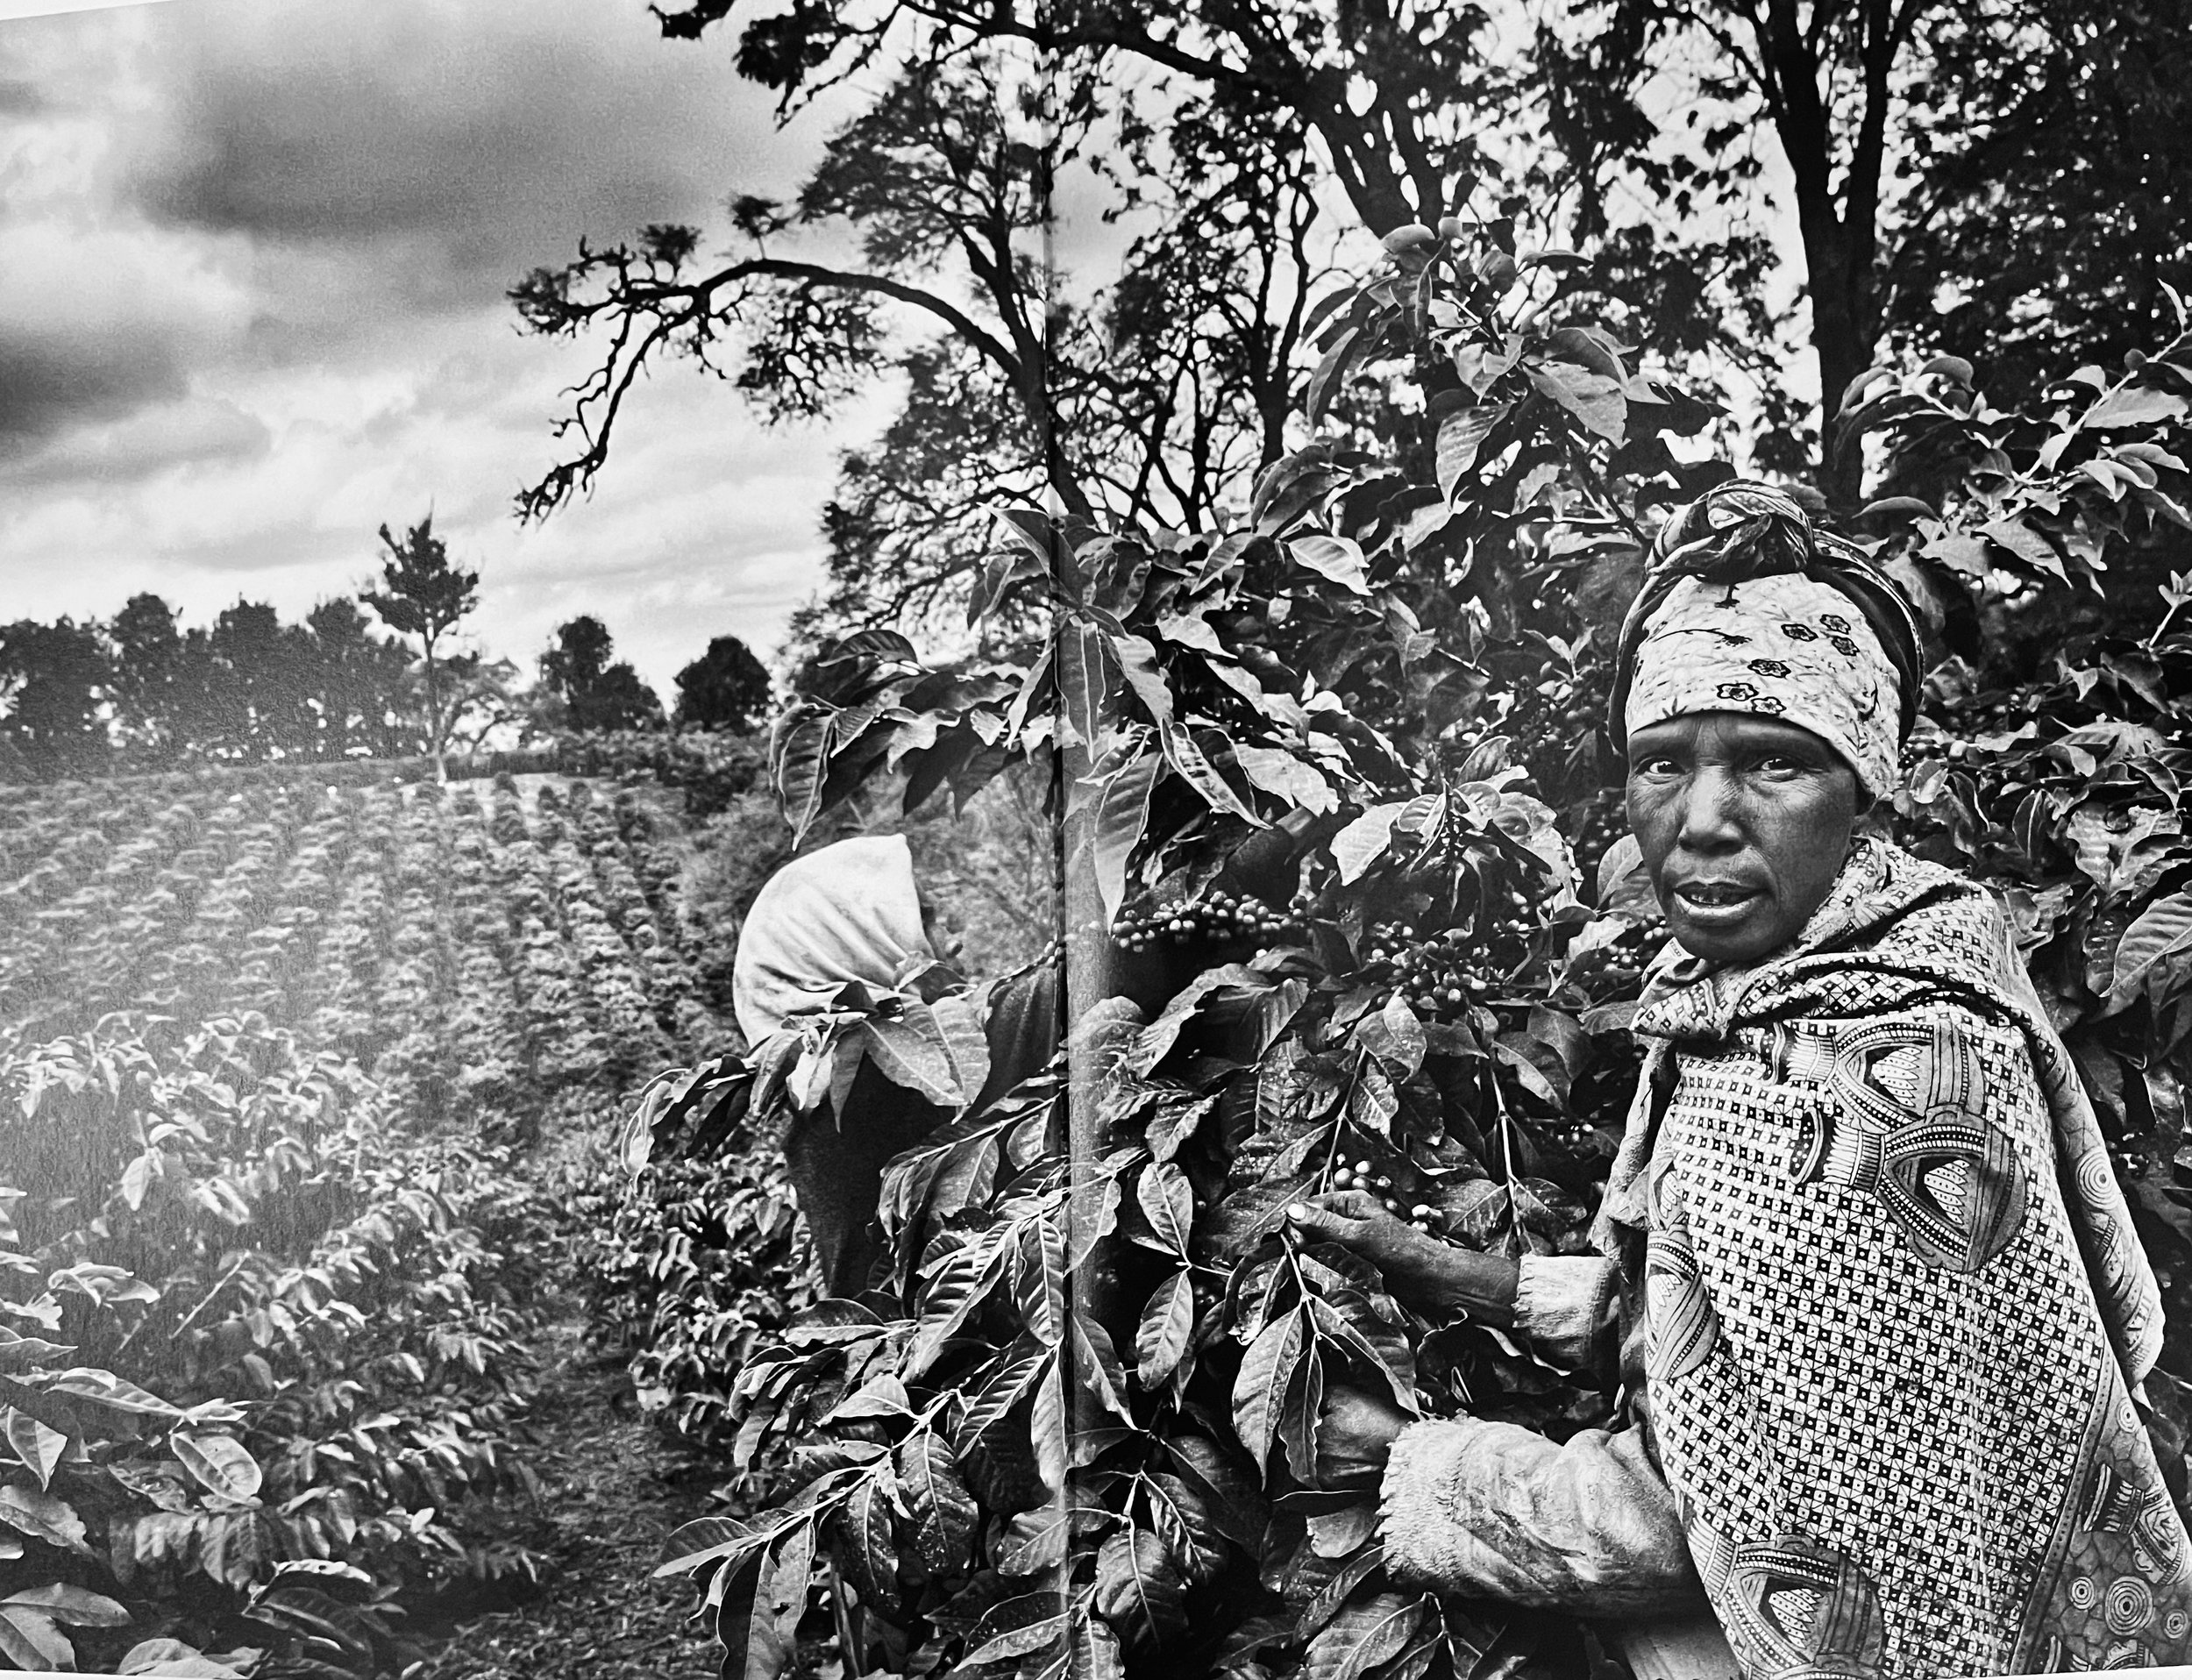
Another magical image by Sebastiao Salgado. Here, we see a woman in the process of picking coffee directly from the plant itself. I have only seen coffee in this form once, while I was visiting the Big Island of Hawaii with some friends and my wife. I took the time to touch those leaves, and I can say from personal experience, the subject of our image indeed has some well worked hands. 

Notice the entire scene. There are two workers in the image, one fully engaged in the work while the other looks directly at the camera. I am a huge proponent of eye contact in all images, but especially documentary work such as this. The use of the intense clouds in the backgrounds really give another element to be considered. To me, this is another example of his masterful work.

This is an impressive book. The book is sequenced in such a way that it brings the viewer into the world of coffee. I advocate all read this book. The photographer gets a masterclass in black and white work and subject placement. The non photographer is immediately brought into a world they may not know. I recommend this book fully.

I leave the reader with some of my favorite images from the book.Enjoy


Olympus MJU-II a review

Point and Shoot Review - Olympus MJU-II

For black and white film photography, I love to have a small point and shoot camera with me. Sometimes, I don't want to have a 'full' camera. My full-frame cameras, both film and digital, are heavy and sometimes obstructive. If I am having a night out with my wife or friends, I don't always want to have a larger camera with me. 


However, my photographer's eye never closes. I am always looking for the following composition. My eye is always on. My eye constantly sees the next image. Because of this, I always have a small point and shoot camera with me. After owning many, my favorite right now is my Olympus MJU-II point and shoot. Let's discuss. 

Describe

The Olympus MJU-II is a minimal point and shoot camera released in 1997 (a great year, it's when I graduated high school :-D ). Here is the camera in the palm of my hand. 

tiny MJU in my large hands

The camera measures 108 x 59 x 35 mm or 4.25 x 2.3 x 1.4 inches, very small indeed. It fits perfectly in any pocket I have. This is a plastic camera however, the camera is all-weather. The all-weather aspect works well, especially since I tend to shoot in the rain often; I have never concerned myself with my camera being wet or not. 

There is a zoom and fixed lens model. I have never cared for zoom lenses, being the kind if street photographer I am. I have the fixed lens, which is a 35mm f/2.8 large aperture lens. 35mm is one of my favorite two focal lengths for street photography work, so this camera works perfectly for me. 

The camera has a sliding door that not only acts as a cover for the lens, but also as a power supply. After opening the sliding door, power is applied to the camera. The flash is also turned on when the cover slides open. More on this later. 

How does this 35mm lens play out? The MJU has some great rendering and Bokeh, although you have no control over when Bokeh will be affected. As with all point and shoot cameras, the internal light meter determines both aperture and shutter speed. I find the MJU extraordinarily accurate, meaning the camera picks the correct settings for the situations I put the camera in. 

Fayetteville, 2021, Olympus MJU-II

Ease of use?

Loading film into the camera is straightforward. Open the door, place your film in, and pull the excess roll around the internal roller on the camera. Then close the door. The camera will automatically load the film to the first exposure. 

Fayetteville, 2021, Olympus MJU-II with timestamp


The camera can read DX coded film rated from ISO 50-3200. This ability is great but is the first concern with the camera. I am a film shooter, and I use a bulk loader for my Kodak Tri-X 400 film. The reusable film canisters I have are not DX coded. Without a true DX code, the camera 'assumes' the photographer loaded 100 ISO film. I have gotten around this problem by purchasing DX coded stickers to add to my reusable canisters. 

The viewfinder is bright, and the magnification is very accurate to 35mm. However, the viewfinder is relatively small. For people with glasses or with bad vision (like I have), you may have some concerns with what you see in the viewfinder. To counter this, I tend to shoot from the hip. I have been shooting with the 35mm focal length long enough to know (generally) what will be in frame. 

Autofocus with the MJU is a joy. I have put roughly 35 rolls of film through the camera. I have never had a problem with autofocus. Autofocus is done at the center of the frame. A green light in the viewfinder will show when you have found focus. I have trusted it with no problems. 


The battery used for this camera is a 3-volt CR123 battery. These batteries are easily found online and are very, very cheap. Also, the camera does not seem to eat batteries at all. I changed to a new battery in 2019, and after 30 rolls, I still have a full battery. 

easily fits in a pocket

Finally, I'll touch on Bokeh. Depth of field, especially when focused very close, works well. The MJU has a functional focus range of 0.35m (13.8 inches) to infinity. This means you can get extraordinarily close, if needed. Here is an example of what Bokeh could look like

Bad things

There are some concerning potential problems with the camera. Here are some things to consider. First, the camera is very 'plasticy'. For some, this may not be a concern. The plastic nature of the camera does not bother me because I am a child of the 80s and 90s when everything was plastic. The plastic feels strong and sturdy; however, I could see how some would say the MJU feels somewhat like a toy. 

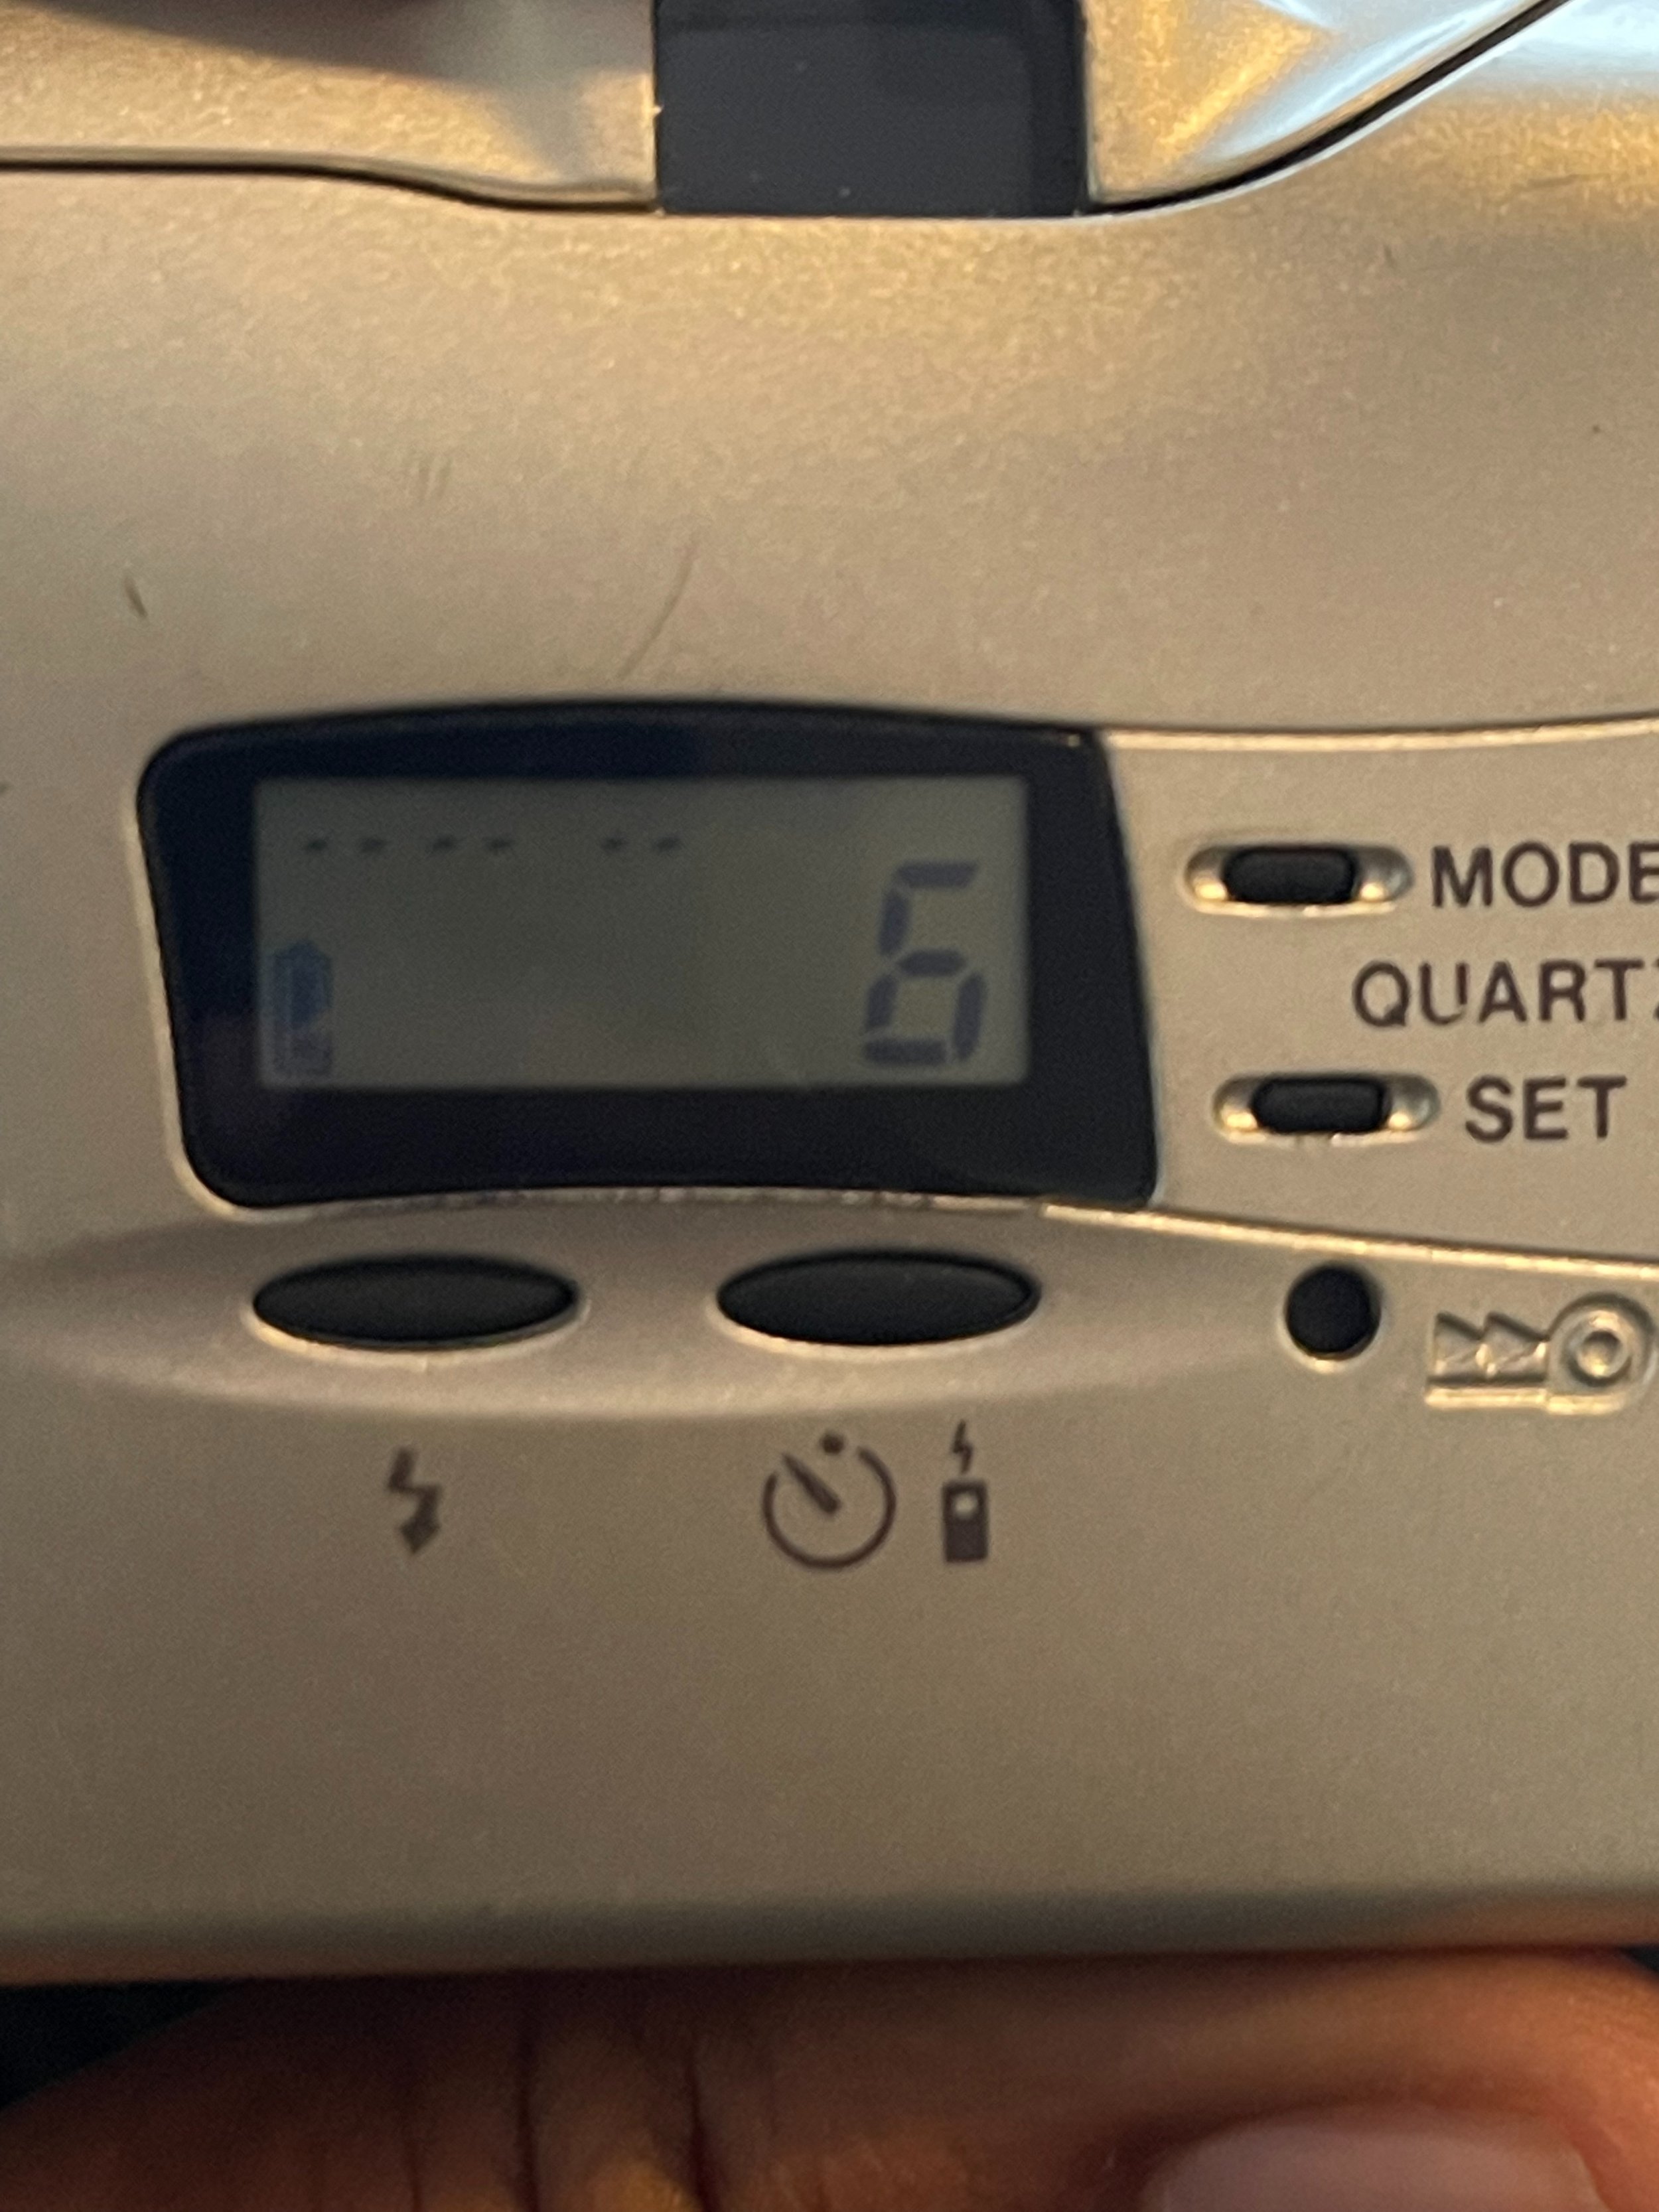
Olympus MJU-II LCD display. Notice battery on LCD. Also, notice flash button.

Second, as above, when you open the cover, the flash will automatically turn on. For those street photographers that are trying to be 'stealthy.' If you forget that the flash is on, this could be a concern. To turn the flash off, after opening the cover, press the flash button on the back twice. Again, I do not find this to be a problem, but some might. 


Conclusion

The Olympus MJU-II is an excellent point-and-shoot camera. As metal point and shoot cameras get more expensive, now would be a great time to get a cheaper fixed lens camera. IT has some quirks, and the constant flash can be annoying. However, a fixed lens 35mm f/2.8 film camera that fits in a shirt pocket is a steal. Let me know what you think. 


Maurice D Masdeu

Four reasons we should all study photo books

Why do we study photo books? What can we gain from studying photo books? Let's explore together. 

Photo books on a table

Photobooks I personally own

Photo books are collections of images placed together in book form. They are often a body of work, years of a certain photographer's practice. We should read them more often. 

I love photo books. I find it an advantageous way to understand my craft. One must do street photography; photographers can't learn it through instruction alone. Please understand me; I am not making this post to say that simply reading a photography book will make you the next great photographer. No. I think that each photographer can enhance their skill by using photo books.


As a medical provider (in a previous life), I would still have to do some rigorous medical education even after seeing multiple patients over a year. This medical education helped sharpen my discernment and understanding of patients and increasingly changing medical conditions. I argue that as photographers, we should treat our craft with similar professionalism and urgency. Photo books are a way to continue our education as photographers. What are some ways studying photo books helps? Here are five reasons. 

Page from Magnum Contact Sheets

Understand art history

As with all art, understanding the history behind what you're doing is essential. While some photographers could have extraordinary natural talent and understanding of what came before, you can only shape your craft for the better by further study. I'll think of this as I think of music. Growing up, I loved hip-hop. I know the 80s influenced the hip-hop artists I loved in the 90s.


Similarly, all of the great street photographers I look up to pay homage to older street photographers . We should use our photo books in this vein. It's more than a glimpse into the past. It's a way to understand what hello photographers were doing in the past. It's a way to connect, learn from, and get mentorship from older legends of photography. Ultimately, an understanding of art history helps form and shape the type of photographer you will be. But this only looks at art on the whole; what is your personal history as a photographer?

Image from “The World Through my Eyes” Daido Moriyama


Know your photographic history 

Is your goal to fundamentally change the art market with your unique vision? I think that is a goal all artists have, but we have to know that history to know what we're fundamentally changing. This is another reason to consider photo books part of your artistic journey. Understanding art, on the whole, can be helpful. However, understanding your photography, in particular, can change your understanding of yourself. Where do you fit in the lineage of photographers before you? Do you stand on the shoulders of giants? If so, then who? We have to evaluate our history as photographers to understand how to move the profession forward. 


Perhaps you're stuck in a rut; I argue that studying photo books will help you understand new methodology that you wouldn't have considered previously. I further argue that to create something new, we have to be intimately familiar with the past. 

Find your visual voice.

To paraphrase Bresson, your first ten thousand shots will suck. This is just true with any endeavor or practice that you want to make perfect. Perhaps out of the context of not sucking, do you want to find or refine your visual voice? Again, photo books come into play. Here we can understand a photographer's intent. Unfortunately, we are trained by Instagram and other photo-sharing platforms to only consider one image at a time. This is fundamentally incorrect. When an artist presents a body of work it's just that, a body of work. While some words in a sentence can be interesting, it's the sentence itself that really moves you. It's the entire paragraph of the full essay that can really inform your view of the world.

Book cover - Daido Moriyama - The World Through My eyes.


Similarly, understanding the full breadth of white one was trying to present is important. Consider Daido Moriyama's photo book "The World Through My Eyes." The book, of course, consists of individual images that are fantastic. But taking in the entire work changes the story the author was trying to tell. Taken together, you see the scenes of Tokyo. You get a full sense of what he was trying to say and ultimately what his visual voice is. 


Way to do the act of photography when you actually can't 

Coronavirus lockdowns have stopped some of the work that I would typically do. It has moved me to sit and reflect much more. The act of photography for me is catharsis. It's a way to express myself and entirely focus on something without any of the distractors of life. Not being able to do that has been challenging.


When reading a photo book, I can imagine what it was like for that photographer to take that image. 


Why was he standing there? How did he get into that position? Why did she choose that F stop? Why did she decide to use that perspective? How did the camera get so low? 


All these things are thoughts and ideas that go through my head when I'm out shooting. I find that I can use my imagination and literally bring myself to that place. I can be where the photographer was; I can imagine what they did. Believe it or not, this has helped me many times in my work.


And I hope this post is a help you. Thanks so much for taking the time to read this. Part 2, how to study photos books, will be coming soon. 


Maurice D Masdeu…

Images from “Where I find Myself” Joel Meyerowitz

Can I learn photography on my own?

The short answer is yes!

Photography, like any other art form, is entirely learnable on your own. And I fully mean this for any "style" of photography you are considering. There are trendy black and white fine art photographers that have no formal training in photography. Truthfully, learning photography on your own can be done quickly with just a few steps. Here's my guide.

Step 1 - Master exposure.

In a literal sense, photography is a term coined by John Hershel, meaning "drawing with light." Just as a traditional artist must master their medium (stencils, paint, ink, clay, etc.), the budding photographer must master their medium, light.

For exposure, this image was shot at a shutter speed of 1/500 sec, an aperture of f/2.0, and ISO at 100.

For exposure, this image was shot at a shutter speed of 1/500 sec, an aperture of f/2.0, and ISO at 100.

Ultimately, light in photography is effectively measured in stops. The photographer must understand how these stops of light work in all aspects of their photography. It does not matter which camera you use; understanding the why of stops of light will make your images better.

I recommend conducting a search with "photographer's exposure triangle" in your favorite search engine as a good starting point.

As a new photographer learning on your own, one should have an understanding of aperture, shutter speed, and ISO. Once you understand these things, learn how your specific camera deals with each. Perhaps your camera sets your aperture and Sutter speed for you. Perhaps your camera sets the ISO for you. Maybe your camera is like mine and you set each of these characteristics every time you shoot in manual mode. Either way, your mastery of exposure as it pertains to your particular camera will be paramount to your success. I think Ansel Adam’s book “The camera” (Amazon link) is a great introduction to understanding exposure


Step 2 - Master composition

Composition is a subjective aspect of photography. However, as with any art form, you can learn from previous work. I use photo books as my means of learning from masters. When I open the photo book, I look at how the photographs are composed, why the photographer put themselves in that position, what story was the photographer intending to tell with that specific composition. Then, I think if I can re-create (not copy) that composition in my own style. I would argue that you should do the same.

Once you figure out what your niche in photography is going to be (even if you're not considering one), try and look at what others are doing in that style. Pay attention to how they place their subjects in the frame. What do they include in the frame and why? I am not saying that you should outright copy anyone. This, of course, is wrong. However, all great artists in any form are standing on the shoulders of giants. People who produce music don't have a natural talent for it; they listen and listen and listen to everyone they respect and come up with their own style.

I like the composition in this image, though composition is very much subjective. What compositions do you like?

I like the composition in this image, though composition is very much subjective. What compositions do you like?

I offer that you can do something similar once you learn What type of photography you want to show the world. Then, go to other visual artists and learn from them (it doesn't have to only be photographers, this can also be from movies and whatever visual medium you like, even comic books). All that matters is you get something from it and use it to forward your photography.


Step 3 - Master one editing solution.

Of course, photography is exceedingly digital, and as such, you should find a software solution that works for you. I use Adobe Lightroom as my primary editing tool. However, I am not advocating any specific tool; I'm just saying I learned Lightroom in such a way over the last four years that I can use it in almost any scenario and generate an image that I want to show the world. This came from consistently using the platform over and over again in both of the desktop and mobile version.

To learn photography, you have to learn how to edit. Whatever your editing solution is, you should know it forwards and backward. As an example, if you were going to be an analog-only photographer, you should pick up Ansel Adams' books and learn everything you can about dodging and burning in the dark room. If not, whatever platform you choose, go on YouTube and learn as many tutorials as possible to master that part of your craft. For those interested, here are Ansel Adam’s “The negative” and “The print” (amazon links) books where he goes more in depth on understanding photography.


Step 4 - Find and master a niche.

My niche is black and white fine art.

My niche is black and white fine art.

Sometimes I think finding a niche for a photographer is one of the hardest things that they'll do. One of the photo books I was reading said that a new photographer should try every style possible. Go shoot batteries for this company, go shoot a wedding, do some baby photography, do some pet photography, etc. It's only until you've involved yourself in all of these different styles of photography that you can truly say "yes, I want to do that!"

When I first started down the path of photography, I thought I wanted to only be a commercial photographer. I tried to set myself up as someone who would take pictures of families and pets, but that doesn't go along with my personality. This is an important point every photographer must come to. How does this type of photography go along with your personality.

I'm an old soldier, I spent 20 years in the military, and I think about things differently. Perhaps it was the military, but I don't really think emotionally, I spend my thinking time in a fact based world. Therefore, I don't care about family photos. I much rather would be a black-and-white photo journalist style street photographer that goes out finds a scene establishes that scene and tries to get the most artistic value from it.

Street Photography School - Shooting in bad weather.

Hello fellow photographers. Let’s dive into gaining an appreciation for shooting in bad weather in regards to black and white street photography. 

Here’s the BLUF (Bottom Line Up Front): If it’s bad weather outside, you should be outside. 

Bronx, 2019 - Rainy day adding a unique element to this black and white image

Bronx, 2019 - Rainy day adding a unique element to this black and white image

Bad weather has a way of creating an atmosphere that is desired in black and white images. A moody, constrasty image. Black and white work ALWAYS works better with contrast. There is no way of getting around it. Pushed Kodak Tri-X 400 35mm film had been popular for half a century for no other reason. When shooting you should be looking for contrast. Remember; for a striking image, contrast is key. I can’t express this enough….CONTRAST IS KEY!!!

Consider this image

Yosemite, 2019 - Consider how the bad weather effected everything in this image

Yosemite, 2019 - Consider how the bad weather effected everything in this image

The mist and the weather are what makes this image, to me. Without the weather, a black and white image may have been washed out. The subjects got more interesting with the umbrella (I am a big umbrella fan). Umbrellas help change the dynamic of the image by changing your silhouette work. In the search for contrast, having a white background due to mist or imposing clouds changes the mood of the photo. However, as with any artistic work, what looks GOOD is up to you. You are the artist, you make the choices.

Bronx, 2019 - look at the ground here…added contrast on the street itself, enhancing the silhouette.

Bronx, 2019 - look at the ground here…added contrast on the street itself, enhancing the silhouette.

Here, notice the ground, dry versus wet. See how the wet ground adds to the mood the image. Notice the changes in reflection and lighting. Again, weather is important in this type of work. I cannot stress how upset I would have been missing all of this great opportunities for work had I stayed in during this short but effective rainstorm.

Fayetteville, 2020 - This was created after a light rain early in the morning. Notice the mist in the far background.

Fayetteville, 2020 - This was created after a light rain early in the morning. Notice the mist in the far background.

Even after the rain has stopped, there will be a certain misting that can be used to the black and white photographers advantage.  I hope you consider what your options are before the next rain comes.

Gear?

I always make sure I buy a weather sealed camera. My current camera is a Leica Q2 Monochrom, which is fully weather sealed. I wanted this feature most in a new piece of gear. I want to know that my camera can withstand punishment (lots of punishment) while I am out in the elements capturing moments . So, first choice should be a weather sealed Lightbox. 

However, if this is not a possibility, what can we do? Improvise, improvise, improvise!

For anywhere between $20-$50 you can get a cover that fits your specific camera. Heres an example from one of my favorite manufacturers of camera gear, Peak design

Peak design Camera cover


On a serious budget? This is not a problem. Remember, the best camera is always THE ONE YOU HAVE ON YOU! (including your phone)

Let’s keep it simple, wrap your camera in a plastic shopping bag or two. Use no residue masking tape to secure the bag to the lens hood (if you have one) and go to town. Here’s how I would wrap one of my cameras if I was concerned about weather sealing on a bad weather day with limited budget. 

My main camera wrapped in a plastic bag with masking tape around the lens hood.

My main camera wrapped in a plastic bag with masking tape around the lens hood.

At the end of the day, just make sure you are out there shooting in bad weather. You will be amazed at your results. If you have any questions or comments, please add them below.

Remember, keep shooting, find your definitive moment, and share your work. Put yourself out there. 


Maurice D Masdeu.


Street Photography School- JPG Versus Raw

Hello fellow photographers. Let’s dive into gaining an appreciation for the difference between RAW and JPG files in black and white street photography. 

Is there really a difference between setting your digital camera to JPEG or Raw for file storage in street photography? Does it matter? Some people swear by RAW files, and some people don’t really care. Lets get into it and understand why…

Fayetteville, NC, 2021 - This was shot in JPG format. I had to commit to these exposure settings because limited editing latitude.

Fayetteville, NC, 2021 - This was shot in JPG format. I had to commit to these exposure settings because limited editing latitude.


What is a RAW file?

A RAW file is nothing more than an uncompressed digital image, which is not yet ready to be printed, as it is not processed yet. (Thus it is raw, as in unused, unprocessed). Each camera manufacturer has their own version of a Raw file. For example, Leica uses the ‘*.DNG’ format, meaning Digital Negative. An another example, Canon uses either ‘*.CR2’ or ‘*.CR3’ meaning Canon Raw version 2 or version 3. This uncompressed digital image   retains the most information from the digital camera’s sensor. 

In editing, RAW files offer a full experience. For example, if an area needs to be much brighter, and you would like to, you have latitude in har FAR you can go. Consider this image. 


NYC, 2019 - RAW Image which had lots for editing.

NYC, 2019 - RAW Image which had lots for editing.

I was able to bring this image from something very dark to something more artistic. This is an extreme example, but drives the point home. If this was originally shot as a JPG, I wouldn’t have been able to push the whites in this image this far with some considerable distortion. This should always be a consideration. 


What is a JPG file?

A JPG file is is a compressed digital image created by the Joint Photographic Expert Group in 1992. The compression gives the photographer a decrease in file storage size as compared to Raw images. This, in turn, represents less image quality. Beyond less image quality, there is another disadvantage/drawback to JPG formatted files. Once the photographer considers the sittings in his camera (clarity, contrast, monochrome vs black and white), these settings are written into the image, permanently. You will not be able to change what you’ve shot when you are done. 

My father and step-father were both film photographers in the 1970’s through the 1990’s. A concept they both expressed and emphasized to me was that you make each image count. No matter what. You won’t have much latitude in the darkroom afterwards. Of course, some areas can be lightly dodged or burned in the darkroom while making a print. I argue that JPG images work very similarly. You have to nail that shot in camera, and can only expect to be able to make very small changes afterwards, in your editing program of choice. 


DC, 2019 - Another JPG Image….no editing needed.

DC, 2019 - Another JPG Image….no editing needed.

Bottom Line!

At the end of the day it’s up to the street photographer to decide which to use. Which is right for you? I argue that you should determine which route (JPG or RAW) you are going to use for the day and STICK WITH IT! Find out which works for you. 

If you have any questions, please add them to the comments below. 

Remember, keep shooting, find your definitive moment, and share your work. Put yourself out there. 


*Maurice D Masdeu*.